jump start your full stack local development with WSL2, Node, and Docker integrating Ubuntu under Windows 11

some time ago I wrote an article with my findings on how to create a local development environment under Windows. since then, a lot has changed, and yet something hasn't: I'm still running Windows (now version 11).
anyway, since I've upgraded my setup, I think it's time to look back on that piece and retrace my steps, updating it for the modern tech we're all using — aren't we?
if you're also on this OS, follow these steps and you'll be running Ubuntu, with pretty much everything you need to mirror your favourite webhost, in a tight and lean package.
so let's dive in.
1. enable WSL2 on Windows 11
open PowerShell as Administrator and enable WSL:
PS> wsl --install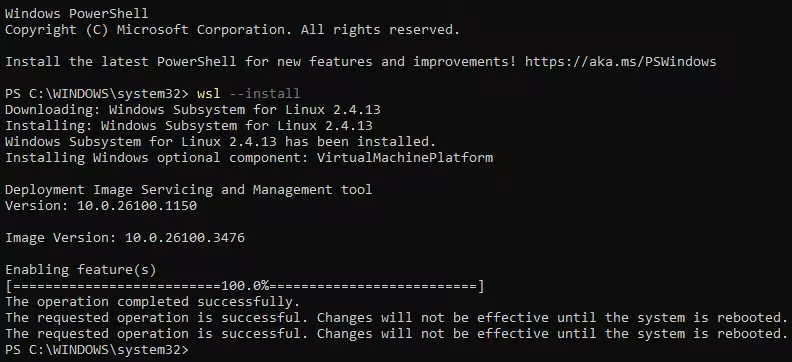
$ wsl --updatethen set WSL2 as the default version:
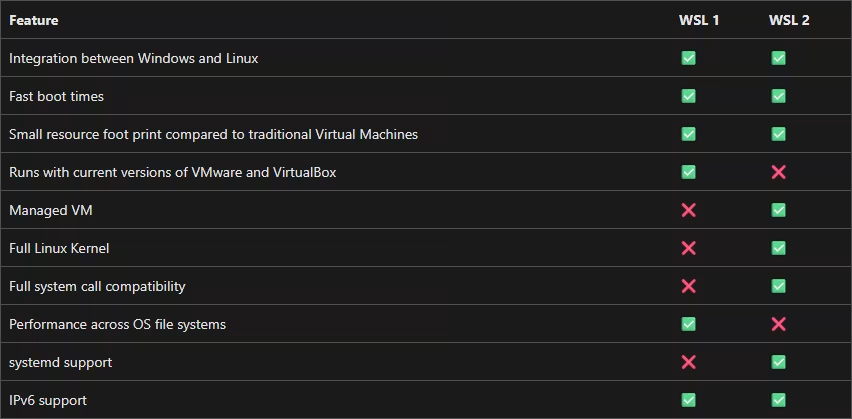
$ wsl --set-default-version 2what's the difference between WSL versions 1 and 2? well, that's a great question, rhetorical person. you can find out more at https://aka.ms/wsl2, but here's a nifty chart:
2. install Ubuntu LTS (Long Term Service)
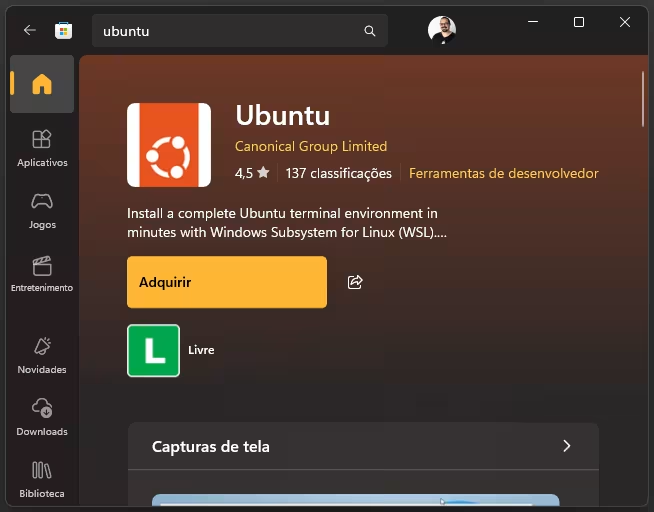
you can find several different Ubuntu versions in the Windows Store. for the purpose of this solution, grab the generic one, which will keep you up to date with current and future major versions.
keep in mind that the first time you launch it, setting up will take a few minutes. meanwhile, pick a username and password once prompted.
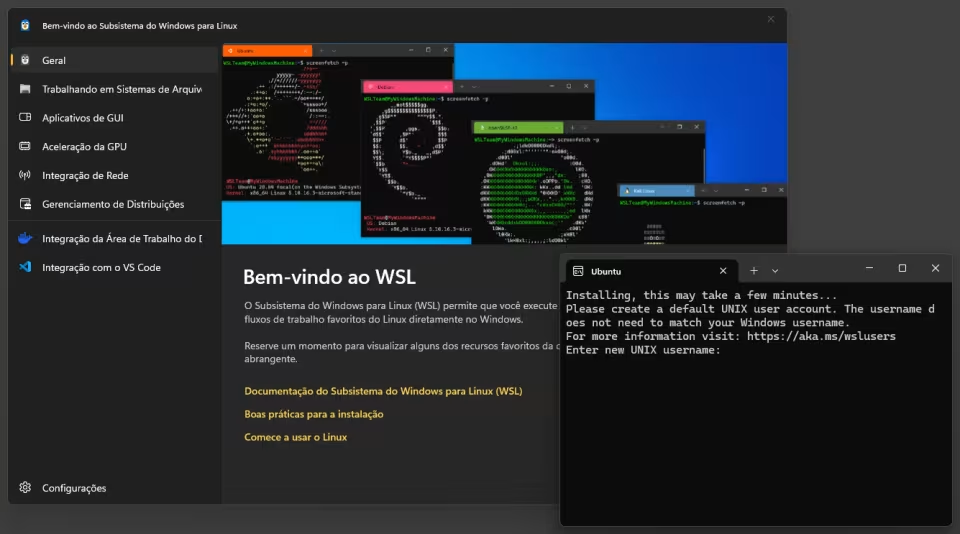
next, update Ubuntu via its terminal:
$ sudo apt update && sudo apt upgrade -ythis is a good command to run from time to time, by the way.
another great tool is Windows Terminal, which will group all your favourite command lines in one, tab-separated place.
3. install NVM (Node Version Manager)
each project runs a different Node.js version. in order to keep up with that, it's nice to have a tool to assist you in swapping versions. that's where NVM comes into play.
run the following command:
$ curl -o- https://raw.githubusercontent.com/nvm-sh/nvm/v0.40.2/install.sh | bashnote: the /v0.40.2/ part is the latest version at the time of writing. double-check periodically at the NVM GitHub repo — look for the readme with instructions.
next, close and reopen the terminal, or run:
$ source ~/.bashrcthen check if NVM is working with:
$ nvm --versionwhich should return the same value as the version in the URL — in this case, 0.40.2.
then install Node.js v22.14.0 LTS (the latest one) using NVM:
$ nvm install 22use it with:
$ nvm use 22.14.0you should see a message such as:
Now using node v22.14.0 (npm v10.9.2)
Creating default alias: default -> 22 (-> v22.14.0)
npm being the Node Package Manager, which installs Node.js dependencies.
if by any chance you don't get the default set, you can set it yourself with:
$ nvm alias default 22.14.0and verify Node.js:
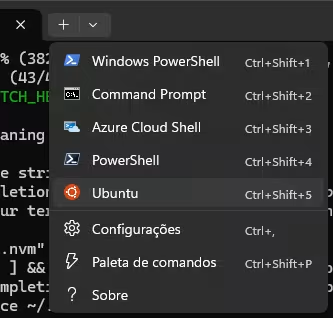
$ node --versionif you downloaded Windows Terminal, you can open Ubuntu under WSL2 with the down arrow like so:
4. install Docker
along with NVM, Docker will assist you in creating several different containers for your projects, each with a different stack.
start with:
$ sudo apt install -y docker.io docker-composethen add your user to the docker group:
$ sudo usermod -aG docker $USERnext, you'll choose either DDEV or Lando for your projects. I've already published a guide for the latter, which you can check out here (and as a bonus, will assist you with a Drupal multisite installation.)
and that's it for this guide. happy coding!
Originally published at https://linkedin.com on March 27, 2025.